Tickets
Tickets are created when vendors face any problem or have any questions anywhere in the system. Admins can also add tickets on any issues and assign other sub-admins to solve the issue.
Vendor Tickets
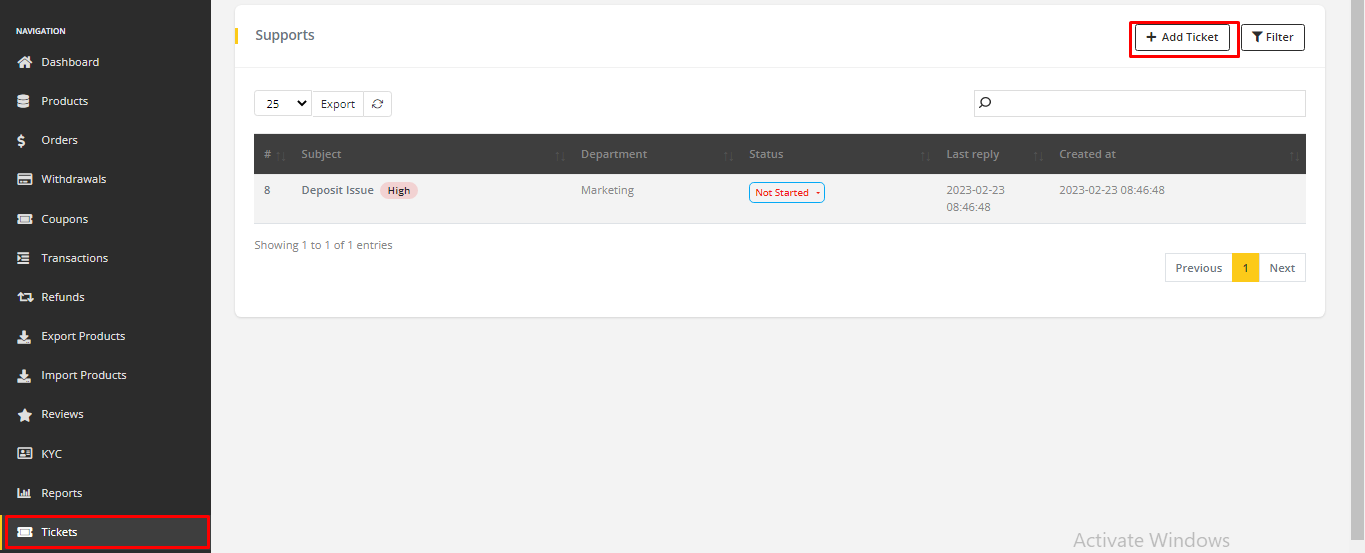
- Go To DevMall Vendor Dashboard > Tickets from the sidebar. To add a new ticket, click on Add Ticket.
- A form will appear to create the ticket.
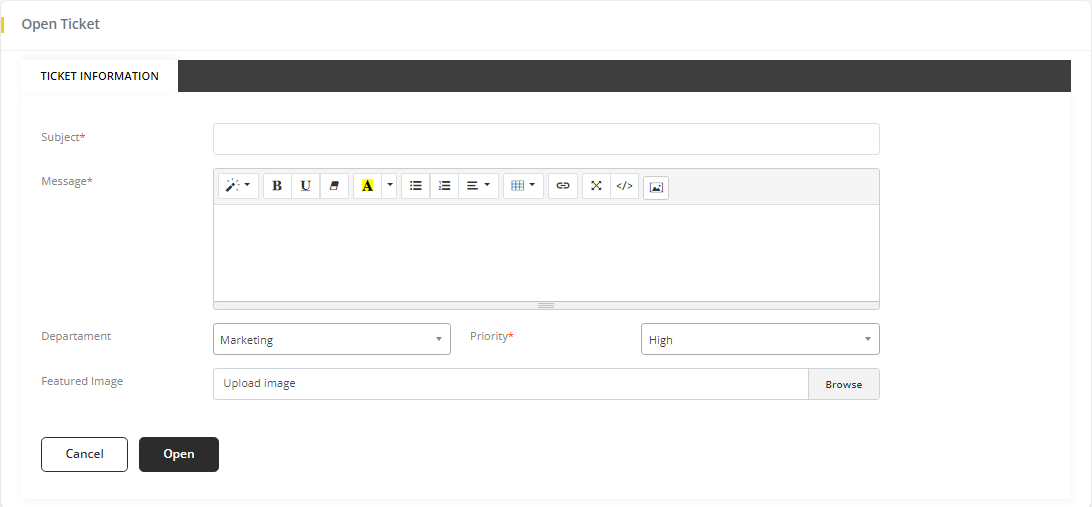
- Enter a Subject. It works as the title of the ticket.
- Explain your issue or questions in the Message text box.
- Select the Department for the ticket. Marketing, Sales, and Technical department are available.
- Select Priority: high, low, or medium based on the importance of your ticket.
- If needed, upload images in the Featured Image field.
- Click on Open to save the ticket. Admin will receive an email that a ticket is created.
Vendor Reply to Ticket
- When a ticket is created, Vendor can reply to the ticket. To view the details of the ticket, click on the ticket Subject from the ticket list.
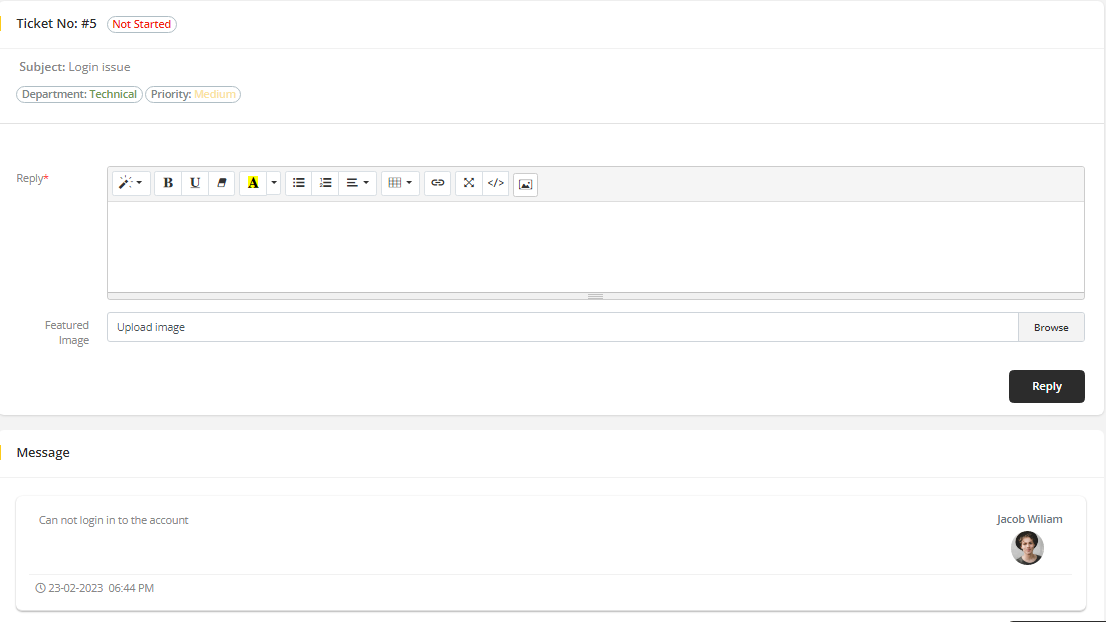
- Vendor can reply to the ticket and add images to the ticket. Click on Reply, and the reply will be sent.
✏️ Note
Once a vendor has created or replied to the ticket, they will not be able to edit or delete it.
Admin Tickets
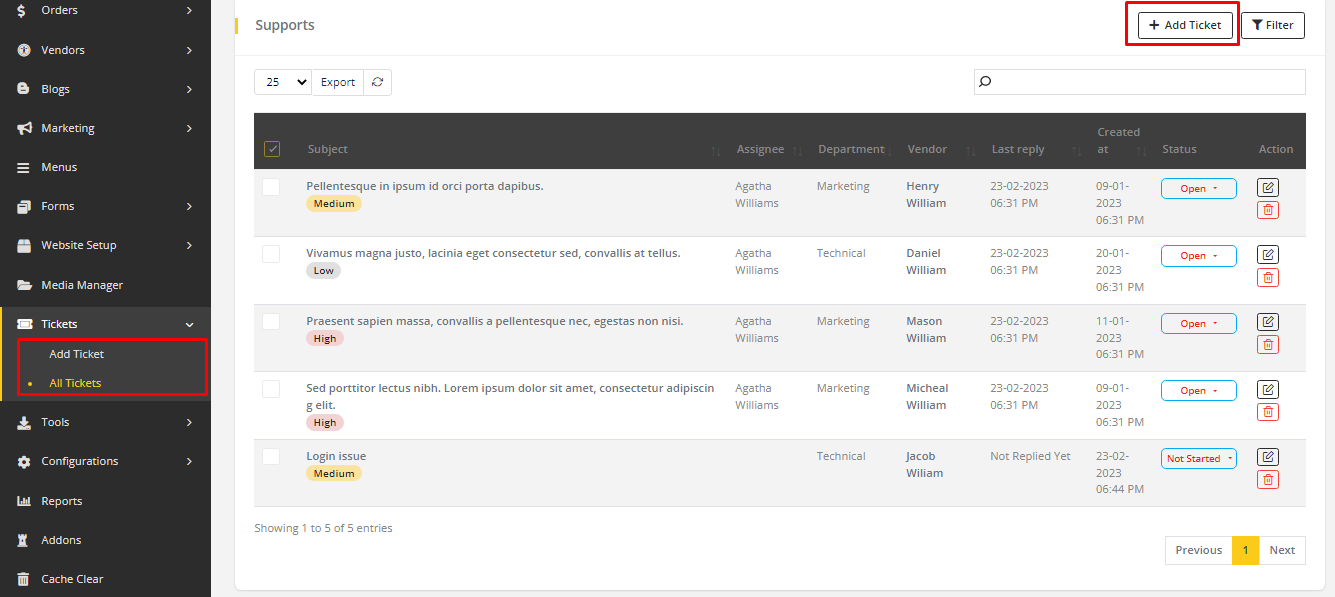
- Go to DevMall Dashboard > Tickets > Add Tickets or DevMall Dashboard > Tickets > All Tickets > Add Ticket.
- A form will appear to create the ticket.
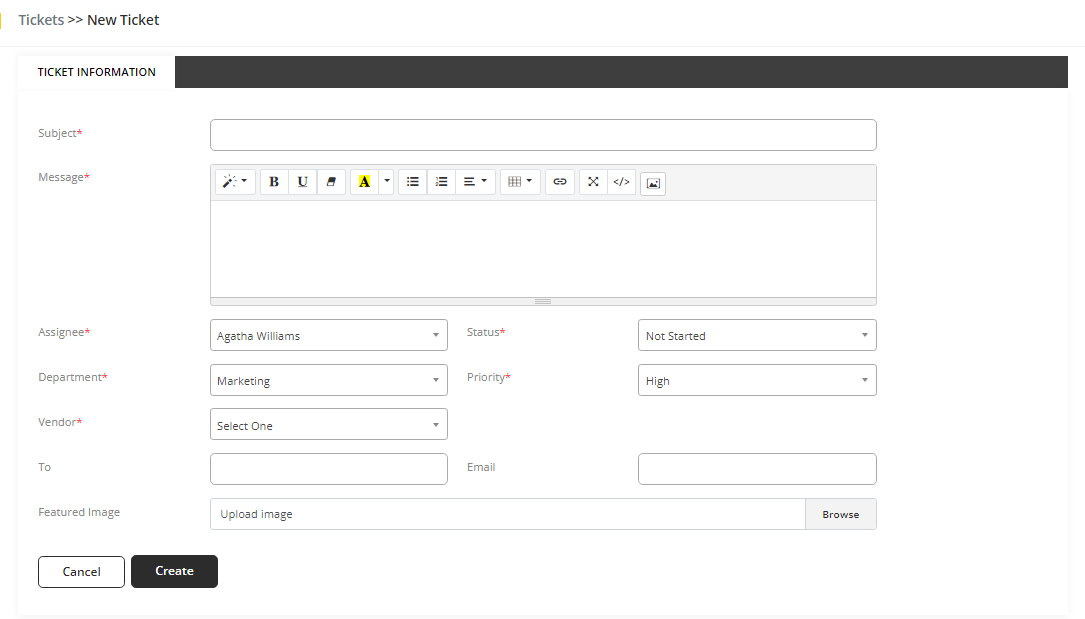
- Enter a Subject. It works as the title of the ticket.
- Explain your issue or questions in the Message text box.
- Select Assignee from dropdown options. Assignee should be Admins or Sub-admins.
- Select Status for the ticket.
- Select the Department for the ticket. Marketing, Sales, and Technical department are available.
- Select Priority: high, low, or medium based on the importance of your ticket.
- Add the Vendor who is related to the ticket. Email and To field will automatically be completed when Vendor is added.
- If needed, upload images in the Featured Image field.
- Click on Created to save the ticket. Assignee and Vendor will receive an Email regarding the ticket creation.
Admin Reply to Tickets
- When a ticket is created, Admin can reply to the ticket. To view the details of the ticket, click on the ticket Subject from the ticket list.
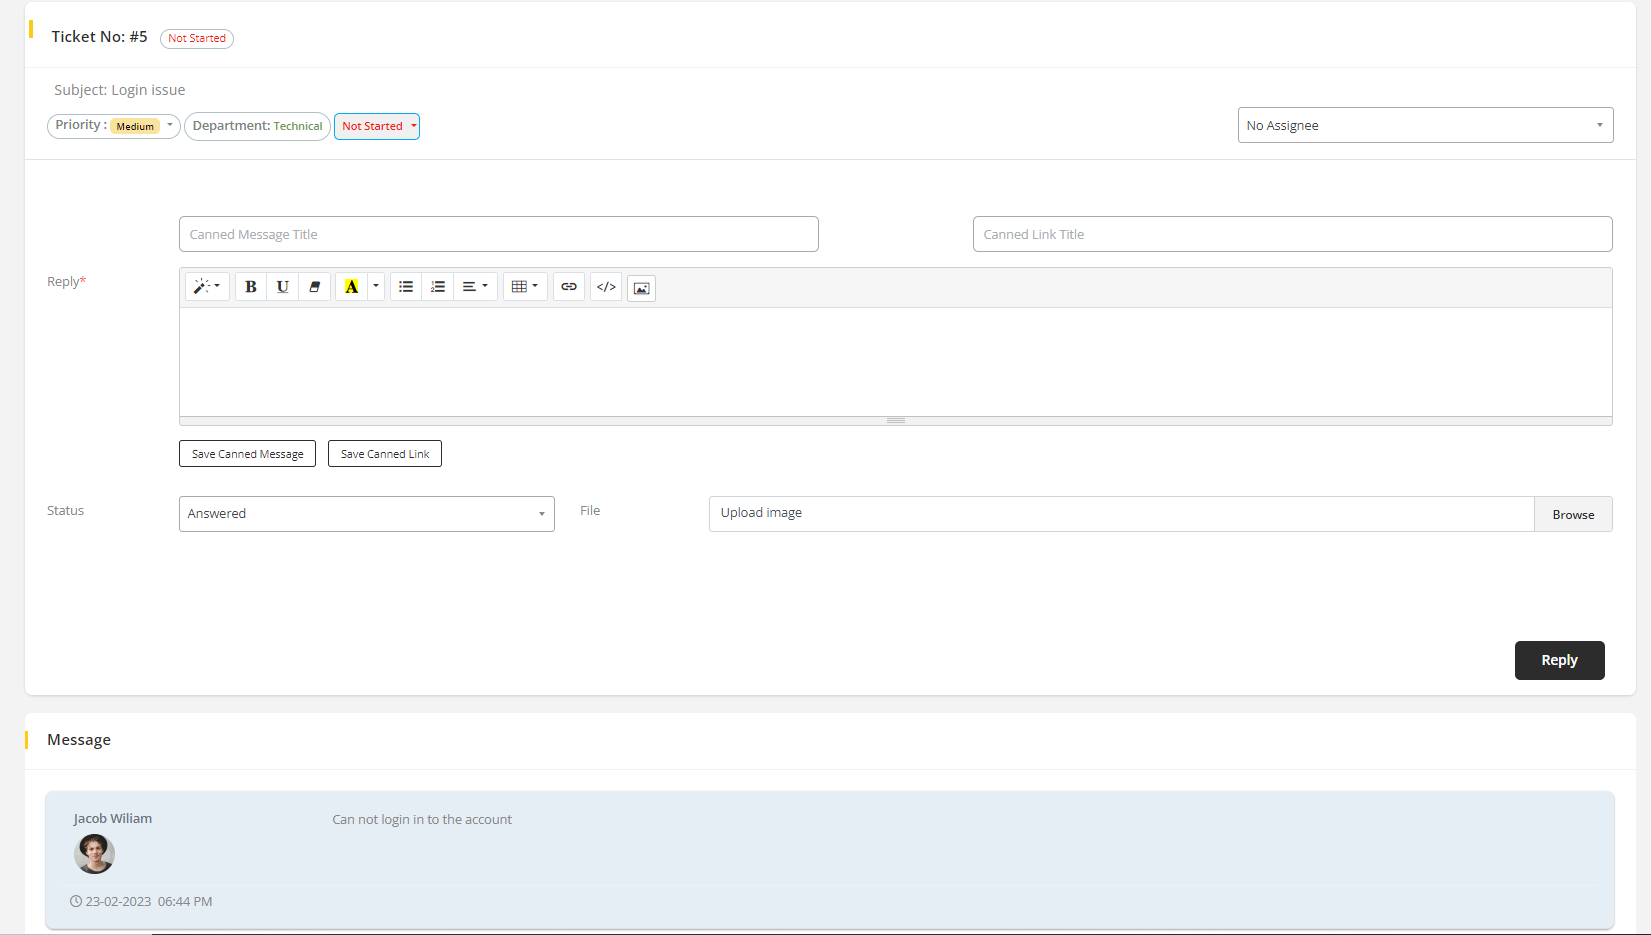
- Status and Priority can be changed from this reply page.
- Admin can reply in the reply box and That reply can be Saved for later use. To save the reply, enter a title in the Canned Message Title and if you want to save a link from the reply, enter a title to Canned Link Title.
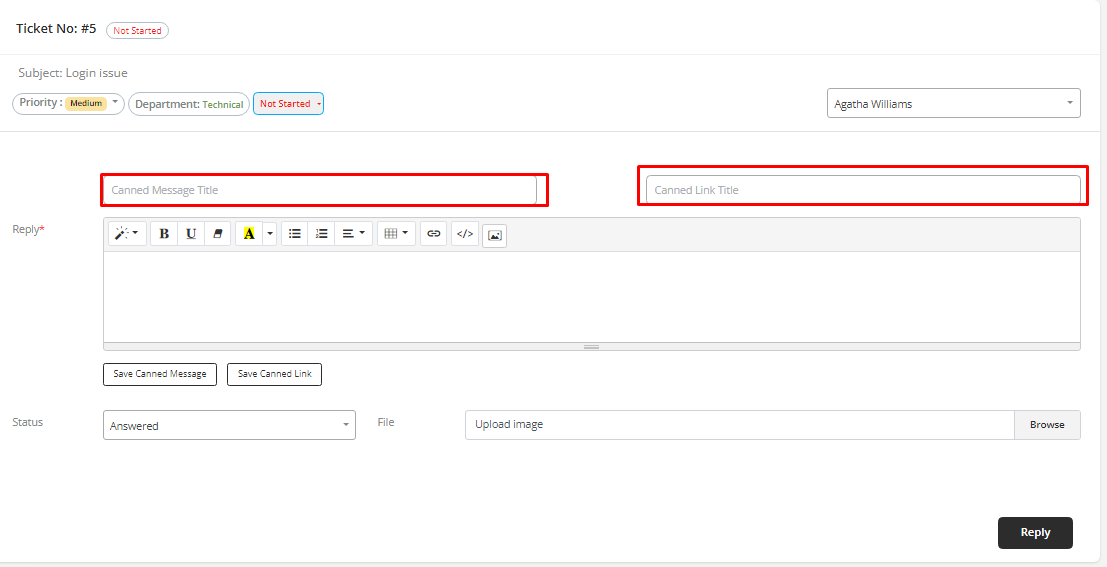
- Click on Save Canned Message to save the message and Save Canned Link to save the link.
- Add images if you need.
- Click on Reply. The reply will be sent.
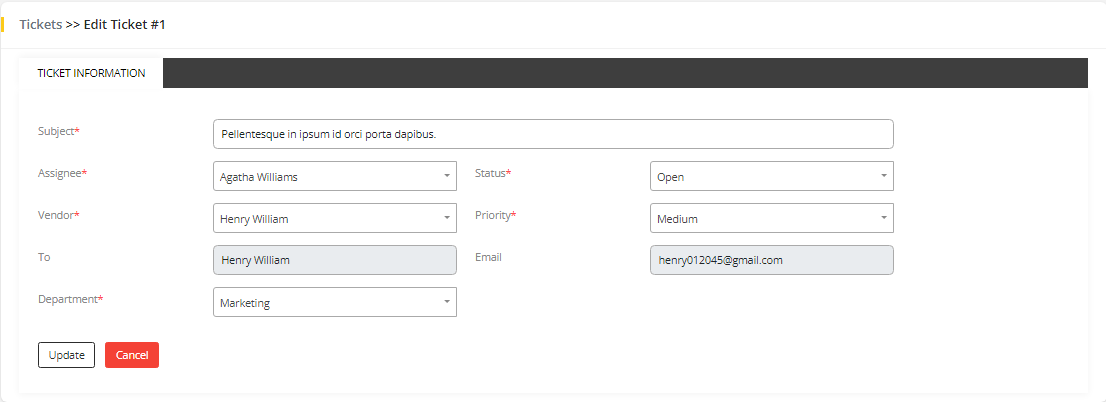
Editing Tickets
- To edit the ticket information, Click on View icon from the ticket list.
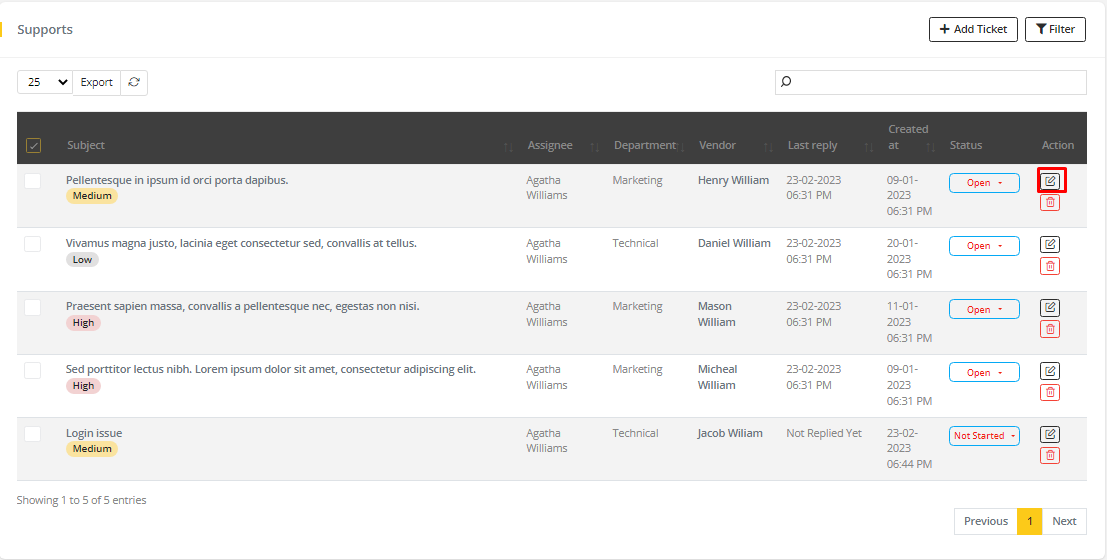
- Admin can edit Subject, Priority, Status, Assignee, Department, and Vendor. Update the changes by clicking on Update.
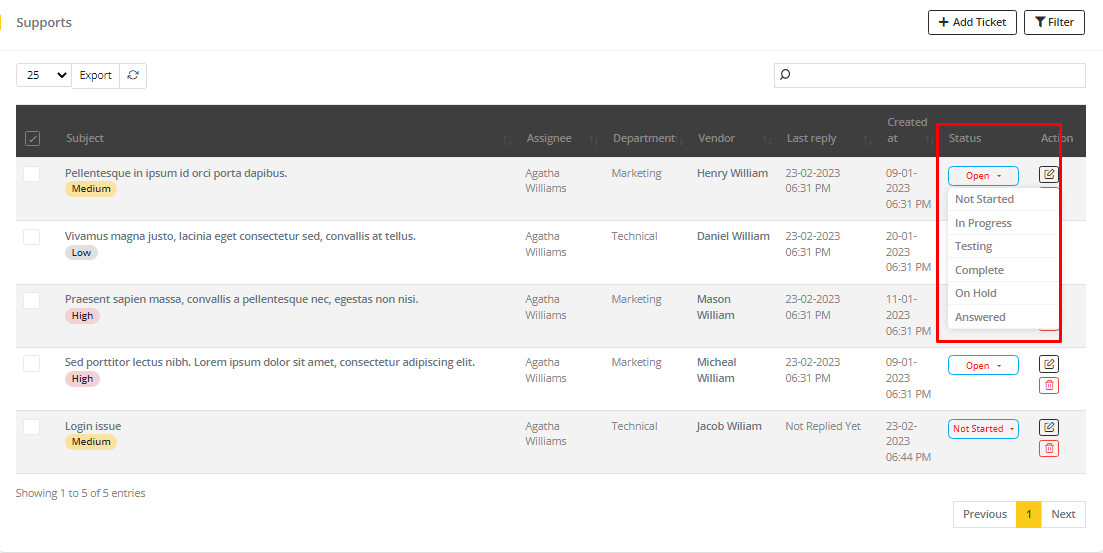
- Admin can also change the Status from the Ticket List.
✏️ Note
Admin can edit their reply and messages, and they can also delete the ticket.